This guide is for anyone who wants to check how much VRAM their graphics card has, whether you’re trying to see if your PC meets a game’s system requirements, diagnosing a performance issue, or just curious what your laptop or desktop is working with. By the end, you’ll know exactly where to look on both Windows and Mac, and why some built-in tools sometimes get the number wrong.
Before you start
- On Windows, this works on both Windows 10 and Windows 11, no extra software needed.
- On Mac, the steps work on all current versions of macOS, but what you see will depend on whether your Mac has an Apple Silicon chip (M1, M2, M3 and later) or an older Intel processor.
- No data is at risk here. These steps only display information, they don’t change any settings.
- If your PC has both an integrated graphics chip and a dedicated graphics card, keep in mind that Windows sometimes reports the integrated one if the dedicated GPU isn’t actively in use.
How to check VRAM on Windows
Method 1: Display adapter properties
- Press Windows key + I to open Settings (or press Windows key + X and select Settings).
- Click System.
- Click Display.
- Scroll down and click Advanced display settings.
- Click Display adapter properties for Display 1.

Illustration: Settings > System > Display > Advanced display settings - A pop-up window will show your graphics card’s information, including Dedicated Video Memory, Display Memory, and Shared Memory.

If you have a laptop or desktop with Intel integrated graphics, don’t be surprised if there’s no separate dedicated VRAM figure. Intel HD and UHD graphics don’t have their own dedicated memory; they borrow from your system RAM instead, which is a bit different from how much RAM your PC has available for everything else. The driver sometimes labels an allocated chunk of that RAM as “dedicated” just so other software recognizes it correctly.
Method 2: DirectX Diagnostic Tool (DXDiag)
- Click the Start button, type dxdiag, and press Enter.
- Select the Display tab.
- Look for the graphics memory figures listed there (the exact field names can vary depending on your system).
A word of caution: on systems with 1GB or more of video memory and 4GB or more of system RAM, DXDiag can report an unexpectedly low “Approximate Total Memory” figure. This has been known to cause problems in games or apps that check available VRAM before allowing you to select the highest detail settings, so treat the DXDiag number as a rough guide rather than gospel.
Method 3: Task Manager
- Press Ctrl + Shift + Esc to open Task Manager.
- Open the Performance tab and select GPU in the left panel.
- Look for Dedicated GPU memory at the bottom: the second number is your total VRAM, and the first is how much is in use right now.
How to check VRAM on Mac
Apple Silicon Macs (M1, M2, M3 and later)
- Click the Apple menu and choose About This Mac.
- Look at the Chip line (for example, Apple M3) and the Memory line, which shows the unified memory the graphics processor shares.
You won’t find a traditional VRAM figure here, and that’s expected. Apple Silicon chips use a unified memory architecture, meaning the CPU and GPU share the same pool of RAM built into the chip itself. Because the GPU doesn’t have its own separate memory bank, there isn’t a dedicated VRAM number to report in the way older graphics cards have.
Intel-based Macs
- Click the Apple menu and choose About This Mac to see the graphics processor name, which may include some memory information on these older models.
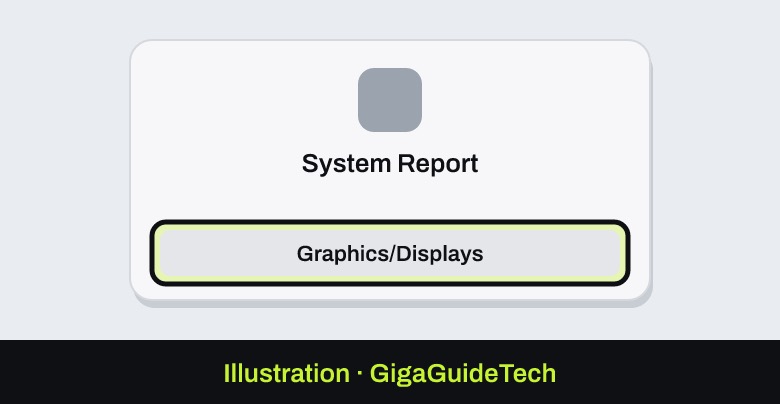
- For more detail, click the Apple menu, choose System Settings, click General in the sidebar, click About, then click System Report. Alternatively, hold the Option key and choose Apple menu > System Information.
Illustration: System Settings > General > About - Click Graphics/Displays in the sidebar to see detailed hardware specifications for your graphics processor.
Illustration: System Settings > General > About > System Report

Checking GPU activity instead of VRAM capacity
If you open Activity Monitor and choose Window > GPU History, you’ll see how hard your graphics processor is working over time. This is useful for spotting performance bottlenecks, but it does not show your total VRAM capacity, only current usage, so it’s not a substitute for the steps above.
If it still doesn’t work
- On Windows, if a graphics card has 2GB or more of dedicated video memory, the separate MSInfo32.exe tool is known to display the figure incorrectly, sometimes as a negative number. This happens because the registry value storing VRAM size is stored as a signed 32-bit integer, which can’t properly represent values of 2GB or higher. Stick to the Display adapter properties window in Settings for a more reliable number.
- If Windows shows “Video Memory: Not Available,” it’s often a driver recognition issue. Try to update your graphics drivers to the latest version from your PC or GPU manufacturer.
- If you have both integrated and dedicated graphics and want to make sure Windows is reporting the right one, check Settings > Display > Graphics to assign specific apps to your dedicated GPU.
- Avoid editing the Windows registry or BIOS settings to try to “fix” or change VRAM figures. There’s no official procedure for this, and BIOS changes in particular carry a real risk of system instability.
FAQ
Why doesn’t my MacBook show a VRAM amount?
If you have an Apple Silicon Mac (M1, M2, M3 or later), this is expected. The chip’s unified memory architecture means the GPU shares RAM with the CPU rather than having its own dedicated VRAM pool, so there’s no separate figure to display.
Why does DXDiag show a different VRAM number than Settings?
DXDiag is known to misreport “Approximate Total Memory” on systems with 1GB or more of video memory and 4GB or more of system RAM. The Display adapter properties window reached through Settings > System > Display > Advanced display settings tends to be more dependable.
Can I increase my VRAM?
There’s no official Microsoft or Apple procedure for increasing VRAM through software. Some custom-built desktops allow adjusting shared memory allocation in the BIOS, but this isn’t officially documented and carries a risk of instability, and many prebuilt PCs don’t offer this option at all.
Does checking VRAM tell me if a game will run well?
It tells you one piece of the puzzle. VRAM capacity matters for texture quality and resolution, but overall performance also depends on your CPU, system RAM, and the GPU’s processing power, not just its memory size.
The bottom line
Checking how much VRAM your graphics card has only takes a couple of clicks on both Windows and Mac, through Settings’ Display adapter properties or Apple’s About This Mac and System Report. Just be aware that Windows’ DXDiag and MSInfo32 tools have documented reporting bugs on higher-memory cards, and that Apple Silicon Macs don’t use traditional VRAM at all thanks to their unified memory design.
Sources: Microsoft Learn, Apple Support